Installer-Krams
- Microsoft Standard Installer Command-Line Optionen
- Debuggen von Systemfehlercodes
- Setup.exe and Update.exe Command-Line Parameters
- Backup and Restore Office 2016 / 2019 Activation
Microsoft Standard Installer Command-Line Optionen
Hier sind standardmäßige Befehlszeilenoptionen für das Microsoft Standard Installer (Msiexec.exe), die ausführbare Datei, die verwendet wird, um Pakete zu interpretieren und Produkte zu installieren.
Befehlszeilenoptionen sind groß- und kleinschreibungsfähig.
Msiexec legt eine Fehlerstufe für die Rückgabe fest, die Den Systemfehlercodes entspricht.
Hinweis
Die Befehlszeilenoptionen, die in diesem Thema identifiziert werden, sind ab Windows Installer 3.0 verfügbar. Die Windows Befehlszeilenoptionen sind mit Windows Installer 3.0 und früheren Versionen verfügbar.
/help
Hilfe- und Schnellverweisoption. Zeigt die richtige Verwendung des Setupbefehls an, einschließlich einer Liste aller Schalter und des Verhaltens. Die Beschreibung der Verwendung kann in der Benutzeroberfläche angezeigt werden. Die falsche Verwendung einer beliebigen Option ruft diese Hilfeoption auf.
Das entsprechende Windows Installer Command-Line Option lautet: /?.
Beispiele
Msiexec /help.
/quiet
Option für die ruhige Anzeige. Das Installationsprogramm führt eine Installation aus, ohne eine Benutzeroberfläche anzuzeigen. Es werden keine Eingabeaufforderungen, Nachrichten oder Dialogfelder für den Benutzer angezeigt. Der Benutzer kann die Installation nicht abbrechen.
Verwenden Sie die /norestart Befehlszeilenoptionen, /forcerestart um Neustarts zu steuern. Wenn keine Neustartoptionen angegeben werden, startet das Installationsprogramm den Computer bei Bedarf neu, ohne dass ein Benutzer aufgefordert oder warnungen angezeigt wird.
Das entsprechende Windows Installer Command-Line Option lautet: /qn.
Beispiele
Msiexec /package Application.msi /quiet
Msiexec /uninstall Application.msi /quiet
Msiexec /update msipatch.msp /quiet
Msiexec /uninstall msipatch.msp /package Application.msi / quiet
/passive
Passive Anzeigeoption. Das Installationsprogramm zeigt dem Benutzer eine Statusleiste an, die angibt, dass eine Installation ausgeführt wird, aber keine Aufforderungen oder Fehlermeldungen für den Benutzer angezeigt werden. Der Benutzer kann die Installation nicht abbrechen.
Verwenden Sie die /norestart Befehlszeilenoptionen, /forcerestart um Neustarts zu steuern. Wenn keine Neustartoption angegeben wird, startet das Installationsprogramm den Computer immer neu, ohne dass der Benutzer aufgefordert oder gewarnt wird.
Das entsprechende Windows Installer Command-Line Option lautet: /qb!- mit REBOOTPROMPT=S Festgelegt auf der Befehlszeile.
Beispiele
msiexec /package Application.msi /passive
/norestart
Option nie neu starten. Das Installationsprogramm startet den Computer nach der Installation nie neu.
Die entsprechende Windows Installer-Befehlszeile hat REBOOT=ReallySuppress sich auf der Befehlszeile festgelegt.
Beispiele
msiexec /package Application.msi /norestart.
/forcerestart
Option "Immer neu starten". Das Installationsprogramm startet immer nach jeder Installation den Computer neu.
Die entsprechende Windows Installer-Befehlszeile hat REBOOT=Force sich auf der Befehlszeile festgelegt.
Beispiele
msiexec /package Application.msi /forcerestart
/promptrestart
Eingabeaufforderung vor dem Neustart der Option. Zeigt eine Meldung an, dass ein Neustart erforderlich ist, um die Installation abzuschließen, und fragt den Benutzer, ob das System jetzt neu gestartet werden soll. Diese Option kann nicht zusammen mit der /quiet-Option verwendet werden.
Die entsprechende Windows Installer-Befehlszeile hat REBOOTPROMPT = "" sich auf der Befehlszeile festgelegt.
/deinstallieren (Produkt)
Produktoption deinstallieren. Deinstalliert ein Produkt.
Das entsprechende Windows Installer Command-Line Option ist/x.
Parameter
<Package.msi| Productcode>
/uninstall (Patch)
Deinstallationsoption. Deinstalliert einen Update-Patch.
Das entsprechende Windows Installer Command-Line Option lautet: /I mit MSIPATCHREMOVE=Update1.msp | PatchGUID1[;Update2.msp | PatchGUID2] festgelegter Befehlszeile.
Parameter
/package <Package.msi | ProductCode> /deinstallieren [; Update2.msp | PatchGUID2]
/log
Protokolloption. Schreibt Protokollierungsinformationen in eine Protokolldatei im angegebenen vorhandenen Pfad. Der Pfad zum Speicherort der Protokolldatei muss bereits vorhanden sein. Das Installationsprogramm erstellt die Verzeichnisstruktur für die Protokolldatei nicht.
Weitere Informationen zu allen Methoden, die zum Festlegen des Protokollierungsmodus verfügbar sind, finden Sie unter "Normal Logging Windows Installer".
Das entsprechende Windows Installer Command-Line Option lautet: /L*.
Die folgenden Informationen werden in das Protokoll eingegeben:
- Statusmeldungen
- Nichtfatale Warnungen
- Alle Fehlermeldungen
- Starten von Aktionen
- Aktionsspezifische Datensätze
- Benutzeranforderungen
- Anfängliche UI-Parameter
- Veraltete Speicher- oder tödliche Exitinformationen
- Out-of-Disk-Space-Nachrichten
- Terminaleigenschaften
/package
Installieren Sie die Produktoption. Installiert oder konfiguriert ein Produkt.
Das entsprechende Windows Installer Command-Line Option lautet: /I.
Parameter
<Package.msi| Productcode>
/update
Installieren Sie die Option "Patches". Installiert eine oder mehrere Patches.
Die entsprechende Windows Installer-Befehlszeile hat PATCH = [msipatch.msp]<; PatchGuid2> auf der Befehlszeile festgelegt.
Parameter
[; Update2.msp]
Empfohlener Inhalt
-
Befehlszeilenoptionen - Win32 apps
Befehlszeilenoptionen für msiexec.exe für Windows Installer 3.0 und früher. Stellt eine Tabelle mit Optionen, Parametern und Beschreibungen bereit. Beispiele zum Installieren von Produkten und anderen Aufgaben.
-
Befehlszeilenoptionen, die von Self-Extractor-Paketen unterstützt werden - Windows Client
Beschreibt die Befehlszeilenoptionen, die von einem Softwareinstallationspaket, einem Updatepaket oder einem Hotfixpaket unterstützt werden, das mithilfe von Microsoft Self-Extractor erstellt wurde.
-
ALLUSERS-Eigenschaft - Win32 apps
Die ALLUSERS-Eigenschaft konfiguriert den Installationskontext des Pakets.
-
Debuggen von Systemfehlercodes
Dieser Abschnitt ist für Entwickler vorgesehen, die Systemfehler debuggen. Wenn Sie diese Seite erreicht haben, während Sie nach anderen Fehlern suchen, sind einige Links aufgeführt, die möglicherweise helfen:
- Windows Update Fehler – Hilfe beim Beheben von Problemen mit Windows Update.
- Windows Aktivierungsfehler – Hilfe beim Überprüfen Ihrer Kopie von Windows.
- Problembehandlung bei Blauen Bildschirmfehlern – Hilfe beim Ermitteln, was zu einem Stoppfehler führte.
- Microsoft-Support – Unterstützung für ein Microsoft-Produkt.
Weitere Möglichkeiten zum Suchen eines Fehlercodes
Wir haben die Systemfehlercodes in diesem Abschnitt aufgelistet, organisiert nach Zahl. Wenn Sie weitere Hilfe beim Nachverfolgen eines bestimmten Fehlers benötigen, finden Sie weitere Empfehlungen:
- Verwenden Sie das Microsoft Error Lookup Tool.
- Installieren Sie die Debugtools für Windows, laden Sie eine Speicherabbilddatei, und führen Sie dann den Codebefehl> !err < aus.
- Suchen Sie die Microsoft Protocol-Website nach dem rohen Text oder Fehlercode. Weitere Informationen finden Sie unter [MS-ERREF]: Windows Fehlercodes.
Fehlercodes von Drittanbietern
Andere Fehlercodes können von Drittanbieterdiensten oder Apps generiert werden (z. B. Fehlercode: -118 kann vom Steam-Spieldienst angezeigt werden), und in diesen Situationen würden Sie sich an die Supportzeile des Drittanbieters wenden.
Systemfehlercodes
Systemfehlercodes sind sehr breit: Jeder kann in einem von vielen hundert Standorten im System auftreten. Folglich können die Beschreibungen dieser Codes nicht sehr speziell sein. Die Verwendung dieser Codes erfordert einige Untersuchungen und Analysen. Sie müssen sowohl den programmgesteuerten als auch den Laufzeitkontext beachten, in dem diese Fehler auftreten.
Da diese Codes in WinError.h definiert sind, werden manchmal die Codes von nicht Systemsoftware zurückgegeben. Und manchmal wird der Code von einer Funktion tief im Stapel zurückgegeben und entfernt von Code, der den Fehler behandelt.
In den folgenden Themen werden Listen von Systemfehlercodes bereitgestellt. Diese Werte werden in der WinError.h-Headerdatei definiert.
- Systemfehlercodes (0-499) (0x0-0x1f3)
- Systemfehlercodes (500-999) (0x1f4-0x3e7)
- Systemfehlercodes (1000-1299) (0x3e8-0x513)
- Systemfehlercodes (1300-1699) (0x514-0x6a3)
- Systemfehlercodes (1700-3999) (0x6a4-0xf9f)
- Systemfehlercodes (4000-5999) (0xfa0-0x176f)
- Systemfehlercodes (6000-8199) (0x1770-0x2007)
- Systemfehlercodes (8200-8999) (0x2008-0x2327)
- Systemfehlercodes (9000-11999) (0x2328-0x2edf)
- Systemfehlercodes (12000-15999) (0x2ee0-0x3e7f)
Setup.exe and Update.exe Command-Line Parameters
InstallShield 2018
Setup.exe can accept a number of command-line parameters. Update.exe (available only for Basic MSI and InstallScript MSI projects) accepts nearly all of the same command-line parameters. Using these parameters, end users can specify such data as the language that the installation should run in and whether to launch Setup.exe silently. For Basic MSI and InstallScript MSI, end users can also pass parameters through Setup.exe to the included .msi file.
Note • Command-line options that require a parameter must be specified with no space between the option and its parameter. For example, Setup.exe /v"ALLUSERS=2" is valid, while Setup.exe /v "ALLUSERS=2" is not. Quotation marks around an option’s parameter are required only if the parameter contains spaces. If a path within a parameter contains spaces, you may need to use quotation marks within quotation marks, as in the following example:
Setup.exe /v"INSTALLDIR=\"c:\My Files\""
Project • Some of the command-line options apply to only certain project types. Project-specific information is listed for each option.
Built-In Command-Line Parameters
This section describes valid command-line parameters for Setup.exe. The parameters are organized into the following categories:
|
Parameter |
Project Type |
Description |
|
Basic MSI, InstallScript MSI |
If you configured the password-related settings for your release on the Setup.exe tab in the Releases view, the end user must specify the password with the /p option when running the installation silently. A typical command is as follows: Setup.exe /s /p"password" |
|
|
InstallScript, InstallScript MSI |
Use this command line to run the installation in record mode. In order to run an InstallScript MSI or InstallScript installation in silent mode, you must first run Setup.exe with the /r option to generate a response file, which stores information about the data entered and options selected by the user at run time. Launching an InstallScript MSI or InstallScript installation with the /r parameter displays all the run-time dialogs and stores the data in a file called Setup.iss, created inside the system’s Windows folder. To specify an alternative response file name and location, use the /f1 option, described below. Basic MSI projects do not create or use a response file for silent installations. |
|
|
Basic MSI, InstallScript, InstallScript MSI |
For an InstallScript MSI or InstallScript project, the command Setup.exe /s runs the installation in silent mode, by default based on the responses contained in a response file called Setup.iss in the same directory. (Response files are created by running Setup.exe with the /r option.) To specify an alternative file name or location of the response file, use the /f1 option. The command Setup.exe /s also suppresses the Setup.exe initialization dialog for a Basic MSI installation, but it does not read a response file. To run a Basic MSI installation silently, use the following command line: Setup.exe /s /v/qn To specify the values of public properties for a silent Basic MSI installation, you can use a command such as the following one: Setup.exe /s /v"/qn INSTALLDIR=D:\Destination" Note • Using this command-line parameter to launch an installation that includes an InstallShield prerequisite does not automatically run the prerequisite installation silently. You may also need to specify a valid silent command-line parameter for the InstallShield prerequisite in the Specify the command line for the application when the setup is running in silent mode setting on the Application to Run tab in the InstallShield Prerequisite Editor. For more information, see Specifying Command-Line Parameters for an InstallShield Prerequisite. |
|
|
InstallScript, InstallScript MSI |
Using the /f1 option enables you to specify where the response file is (or where it should be created) and what its name is, as in the following example: Setup.exe /s /f1"C:\Temp\Setup.iss" Specify an absolute path; using a relative path gives unpredictable results. The /f1 option is available both when creating a response file (with the /r option) and when using a response file (with the /s option). |
|
|
InstallScript, InstallScript MSI |
When running an InstallScript MSI or InstallScript installation in silent mode (using the /s option), the log file Setup.log is by default created in the same directory and with the same name (except for the extension) as the response file. The /f2 option enables you to specify an alternative log file location and file name, as in the following example: Setup.exe /s /f2"C:\Setup.log" Specify an absolute path; using a relative path gives unpredictable results. |
|
Parameter |
Project Type |
Description |
|
Basic MSI, InstallScript MSI |
Note • The /a parameter does not work with Update.exe. Update.exe launches a patch that accesses and modifies an existing cached .msi file on the system, and an administrative installation does not cache the .msi file. The /a option causes Setup.exe to perform an administrative installation. An administrative installation copies (and uncompresses) your data files to a directory that is specified by the user, but it does not create shortcuts, register COM servers, or create an uninstallation log. Tip • If an installation contains InstallShield prerequisites and you want to extract them from Setup.exe, add a path after the /a parameter to extract the prerequisites to that location. A sample command is Setup.exe /a"C:\temp". |
|
|
Basic MSI, InstallScript MSI |
The /j option causes Setup.exe to perform an advertised installation. An advertised installation creates shortcuts, registers COM servers, and registers file types, but does not install your product’s files until the user invokes one of these “entry points.” |
|
|
Basic MSI, InstallScript MSI |
The /x option causes Setup.exe to uninstall a previously installed product. |
|
|
InstallScript, InstallScript MSI (if the InstallScript user interface (UI) style is the traditional style, which uses the InstallScript engine as an external UI handler) |
Important • This parameter does not apply to InstallScript MSI projects in which the InstallScript UI style is the new style (which uses the InstallScript engine as an embedded UI handler). To learn more, see Using the InstallScript Engine as an External vs. Embedded UI Handler for InstallScript MSI Installations. The /uninst option is provided for compatibility with earlier versions of InstallShield. This option causes the InstallScript engine to execute the event handler function OnUninstall, whose default code uninstalls the previously installed product. Project • Note that in InstallScript MSI installations, the /uninst parameter does not invoke the InstallScript engine uninstall behavior that processes install log and removes any resources that were created and logged through script. However, the /removeonly option does invoke this behavior. |
|
|
InstallScript, InstallScript MSI |
The /removeonly option sets the REMOVEONLY system variable equal to a non-zero value. The default code for the OnMaintUIBefore event handler function conditionally displays the SdWelcomeMaint dialog, depending on the value of REMOVEONLY. |
|
|
Basic MSI |
The /instance=<InstanceId> option—which is available for Basic MSI projects that support the installation of multiple instances of a product—lets you specify which instance you want to install, update, or uninstall. <InstanceId> represents the value of the InstanceId property that identifies the instance. Whenever you use this option and include a valid InstanceId value, the installation suppresses the instance selection dialog. For example, the following sample command line installs the instance that has 2 as the value of the InstanceId property: Setup.exe /instance=2 Use default to identify the instance that is installed by the base installation package, as in the following example: Setup.exe /instance=default To specify the instance that you want to uninstall, include the /x option with the /instance=<InstanceId> option. For more information, see Naming an Instance and Run-Time Behavior for Installing Multiple Instances of a Product. |
Passing Data to the Installation
|
Parameter |
Project Type |
Description |
|
Basic MSI, InstallScript MSI |
Use the /v option to pass command-line options and values of public properties through to Msiexec.exe. If you want to pass more than one argument to Msiexec.exe, you can use the /v option multiple times at the command line, once for each argument. For example: Setup.exe /v"/l*v c:\test.log" /v"MYPROPERTY1=value1" /v"/qb" As an alternative, you can pass multiple arguments through the /v option as in the following example: Setup.exe /v"/l*v c:\test.log MYPROPERTY1=value1 /qb" Note • If you pass the /v parameter at the command prompt when launching Setup.exe, any parameters that are specified for the CmdLine keyname in Setup.ini are ignored. To learn more, see Setup.ini. |
|
|
Basic MSI projects that have InstallScript custom actions |
This option specifies command-line parameters to be passed to the script. Any property supported by InstallScript MSI (where appropriate) can be specified. (The most common ones are /d and /z.) For example, the following indicates that you want to debug the script, and that the CMDLINE variable should contain TEST. Setup.exe /v"ISSCRIPTCMDLINE=\"-d -zTEST\"" Note that as shown above, when you want to specify that a double quote character is not a delimiter for the command line but a delimiter for the property, use \". Note also that as with any public Windows Installer property, this property should be specified with all uppercase letters. |
|
|
InstallScript MSI |
The /z option is used to pass data to the InstallScript system variable CMDLINE, as in the following example: Setup.exe /z"My Custom Data" When this command line is used, the variable CMDLINE contains the string My Custom Data. |
Download and Cache Locations (Basic MSI and InstallScript MSI Projects)
|
Parameter |
Project Type |
Description |
|
Basic MSI, InstallScript MSI |
In the Release Wizard, you can specify download locations for the Windows Installer installers InstMsiA.exe and InstMsiW.exe. A user can specify an alternative URL at run time using the /ua option (for the InstMsiA.exe location) and /uw option (for the InstMsiW.exe location), as in the following example: Setup.exe /uw"http://www.otherlocation.com/engines" The file name is not necessary. Note • You must specify the full URL with the parameters. |
|
|
Basic MSI, InstallScript MSI |
In the Release Wizard, for a Web Downloader build, you can specify a download location for your .msi database. A user can specify an alternative URL using the /um option, as in the following example: Setup.exe /um"http://www.otherlocation.com/packages/product.msi" Note • You must specify the full URL with the parameter. |
|
|
Basic MSI, InstallScript MSI |
In the Release Wizard, for a Downloader build, you can specify whether to cache the contents of a compressed package on the local system. With the /b option, the user can specify the directory in which to cache the installation files, as in the following example: Setup.exe /b"C:\CacheDirectory" Note • You must specify the full URL with the parameter. |
|
Parameter |
Project Type |
Description |
|
Basic MSI projects with InstallScript custom actions, |
For an InstallScript project, running the command Setup.exe /d runs the installation program with the InstallScript Debugger. Note • Debugging InstallScript code requires the debug-information file Setup.dbg to be available. In addition, in order to debug an installation on a system other than your development machine, you need to copy certain files from your development machine to the debugging machine. To learn more, see Debugging an Installation on Any Computer. For a Basic MSI project, the following command runs your InstallScript custom actions in the InstallScript Debugger: Setup.exe /v"ISSCRIPTDEBUG=1 ISSCRIPTDEBUGPATH=\"path-to-Setup.dbg\"" |
|
|
Basic MSI, InstallScript MSI |
The /debuglog parameter lets you generate a log file for Setup.exe. To generate a log named InstallShield.log in the same directory as the Setup.exe file, pass just the command-line parameter. Note that this does not work if the Setup.exe file is in a read-only location. For example: setup.exe /debuglog To specify the name and location of the log file, pass the path and name, as in the following example: Setup.exe /debuglog"C:\PathToLog\setupexe.log" To generate a log file for the feature prerequisites in the installation, use the /v parameter to set the ISDEBUGLOG property to the full path and file name for the log file, as follows: Setup.exe /debuglog"C:\PathToSetupLogFile\setup.log" /v"ISDEBUGLOG=prereq.log" You can use directory properties and environment variables in the path for the feature prerequisite log file. |
|
Parameter |
Project Type |
Description |
|
InstallScript, InstallScript MSI |
The /m option causes Setup.exe to generate an SMS Management Information Format (.mif) file. Following is a typical command: Setup.exe /m"SampleApp" Including the “.mif” file extension is not necessary. |
|
|
InstallScript, InstallScript MSI |
Using the /m1 parameter (along with /m) enables you to specify a serial number to be written to the .mif file. A typical command is as follows: Setup.exe /m"SampleApp" /m1"1234-5678" |
|
|
InstallScript, InstallScript MSI |
Using the /m2 parameter (along with /m) enables you to specify a locale string to be written to the .mif file. A typical command is as follows: Setup.exe /m"SampleApp" /m2"ENU" |
|
Parameter |
Project Type |
Description |
|
/passive |
Advanced UI, Suite/Advanced UI |
Use the /passive parameter to runs a suite installer setup in a minimum UI mode (just displaying a progress panel): Setup.exe /passive To uninstall using a minimum UI mode, use the following command: Setup.exe /passive /remove |
|
Parameter |
Project Type |
Description |
||||||
|
InstallScript |
Specifies the amount of time (in seconds) by which initialization of the installation is delayed after Setup.exe is launched. Note • Using the -delayedstart option is recommended when manually launching an additional installation after reboot (for example, by using the RunOnce key). The delay allows the operation system to initialize completely; this prevents the problems—such as Remote Procedure Call (RPC) errors—that can occur if an installation initializes before the operating system has initialized completely. The recommended delay length is 30 seconds. Note that this option is not needed when the installation starts automatically after reboot (for example, due to a call to SdFinishReboot before reboot). |
|||||||
|
Basic MSI, InstallScript, InstallScript MSI |
This parameter allows the setup author to always clone the setup and run it from the temporary directory, even if the setup does not meet the conditions for running from the temporary directory. This parameter is ignored if the setup is a self-extracting executable file (.exe). |
|||||||
|
InstallScript, Basic MSI, InstallScript MSI, Suite/Advanced UI |
This parameter indicates that the original setup should wait for the cloned setup process to complete before exiting. By default, the original setup is enabled to wait for the completion of the installation process. For more information on Clone_wait, see Changing the Default Clone_wait Parameter for the Setup. |
|||||||
|
InstallScript |
Specifies that a self-extracting package’s files should not be run but simply extracted to the location that is specified by <path>. |
|||||||
|
Basic MSI, InstallScript MSI |
The build engine automatically creates an installation that supports Setup.exe cloning in cases where cloning is required (for example, multi-disk installations). If you need to do this manually, pass /h to Setup.exe and it will clone itself to a temporary location and run from that location. |
|||||||
|
Basic MSI, InstallScript, InstallScript MSI |
Suppresses the display of any small and standard progress dialogs that might be shown during initialization. The small progress dialog is usually used for installations that display a splash screen during initialization, since a standard-size progress dialog does not leave any space for the splash screen. Specifying the /hide_progress option hides the small progress dialog for those installations, so end users would see just the splash screen without any progress indication. Note • For InstallScript installations: If you specify /hide_progress and include a splash screen in your InstallScript installation, the length of time that the splash screen is displayed depends on whether SmallProgress=Y or SmallProgress=N is specified in Setup.ini.
For InstallScript MSI installations: If you include a splash screen, the installation automatically switches to the small progress dialog, and the splash screen is shown only during the time that the progress dialog is displayed. Note that this is true even if /hide_progress is specified. Therefore, it is recommended that you avoid using /hide_progress with a splash screen in InstallScript MSI installations. |
|||||||
|
InstallScript, InstallScript MSI |
Suppresses the display of the splash screen if one is included. |
|||||||
|
InstallScript |
Suppresses display of the dialog that is displayed by an update-enabled installation to let the end user select which instance of your product will be updated. This dialog is displayed by default when an update-enabled installation detects multiple previous instances. When this command-line option is used and an update-enabled installation detects multiple previous instances, the installation creates a new instance. |
|||||||
|
InstallScript |
Specifies the value of the system variable INSTANCE_GUID; for example, -ig{722C7440-B317-4B3B-AECA-0199EA4E7CDB}. If this option is not used, the installation automatically assigns a value to INSTANCE_GUID (for multi-instance installations, this value is a newly generated GUID; for standard installations, this value is the same as the value of PRODUCT_GUID). This option is useful if you have created an installation launcher—that is, a custom application that runs before your installation does to perform pre-setup tasks, such as determining the instance GUID that you want to use for the installation. Do not specify anything other than a valid GUID with this option. |
|||||||
|
InstallScript |
This option is similar to the media_path option except that this option forces the installation to behave like a launched One-Click Install installation, even if the path to the media files is not a URL. Use this option if you are launching the installation from a Web page manually. In addition, this option is added automatically if the built-in Setup.ocx file is used to launch the installation. |
|||||||
|
InstallScript |
This option indicates that the installation should look for the Disk1 files in the location that is specified. Note that only the Setup.exe file needs to be in the original launch location; the installation obtains all other required files from the specified location (including Setup.exe, which must be present in the media location). You can specify a URL as the path to the media files; in this case, the installation behaves like a launched One-Click Install installation, which always shows the security dialog. To learn more about the behavior of One-Click Install installations, see One-Click Install Installations in InstallScript Projects. |
|||||||
|
Basic MSI, InstallScript, InstallScript MSI |
This option indicates that the installation should run in the specified language as specified. You can specify the language ID as either a hexadecimal or decimal number. If you specify the hexadecimal number, be sure to proceed the value with 0x. For example, the following commands indicate that the installation should be run in German: Setup.exe -L0x0407 Setup.exe -L1031 Note that if you specify a language ID that is not supported by the installation or you specify an invalid language ID, the parameter is ignored. Also note that if this parameter is specified and it is valid, the language dialog (if enabled) is automatically suppressed. |
|||||||
|
Basic MSI, InstallScript MSI |
For a Basic MSI project, the /w option forces Setup.exe to wait until the installation is complete before exiting. Note • If you are using the /w option in a batch file, you may want to precede the entire Setup.exe command-line option with start /WAIT. A properly formatted example of this usage is as follows: start /WAIT setup.exe /w |
|||||||
|
InstallScript MSI |
For an InstallScript MSI project, Setup.exe automatically waits for the installation to finish before exiting, so this option (used by earlier versions of InstallShield Professional) is no longer necessary. |
Backup and Restore Office 2016 / 2019 Activation
If you still couldn’t recover your Office product key, the last resort is to backup Office activation before reinstalling Windows or Office, so you can reactivate it later.
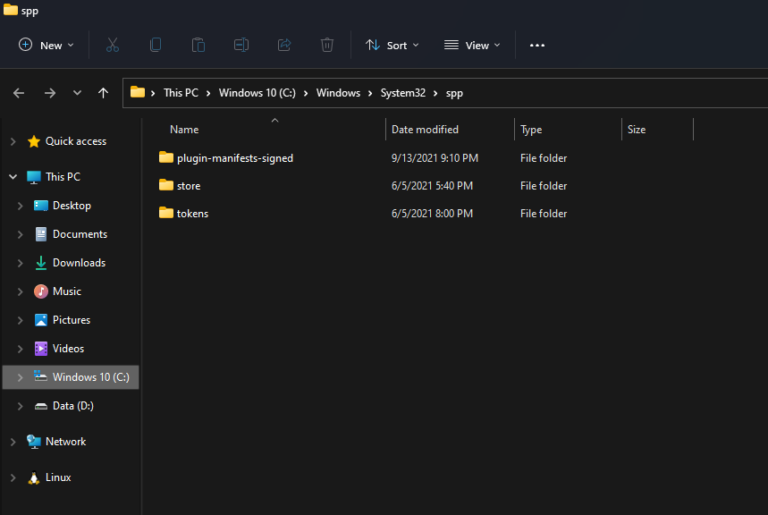
To do this, open File Explorer and browse to the location: C:\Windows\System32\spp. Make a backup copy of all its folders/files and save them to an external USB drive for safekeeping.
After installing a fresh copy of the same edition of Office, you can activate it by restoring the backup files to its original location: C:\Windows\System32\spp.
When pasting the files, you may get an error message informing me that “The action can’t be completed because the folder or a file in it is open in another program“.
To get around this problem, just close the Office application and run the following command to stop the sppsvc service: net stop sppsvc
When the files are restored, re-launch your Office application and you’ll find the product is already activated. You can also use this method to transfer Office activation over to another computer. But remember to deactivate Office on your old PC before restoring the activation to your new PC.