Win3.11
Inatallationsanleitung für DOS-Box
DosBox, Windows 3.11 & Games
Mitunter soll ältere Software nochmal zum Laufen gebracht werden. Gründe gibt es mindestens zwei: man will ältere Dokumente lesen und benötigt den entsprechenden Reader oder … „Just4Fun“ …man will nochmal ein altes Spiel von früher Spielen. Ich habe letzteres mit „Mamba“ probiert.
Benötigt wurde dafür Windows 3.11 und ich hatte ein Ubuntu 18.04.
Die Schritte in der Übersicht:
- DosBox installieren
- Laufwerk anlegen und einbinden
- Windows 3.11 installieren
- Mamba auf das Laufwerk auf und starten
…und nun die Details…
DosBox installieren
Unter Ubuntu reicht hier ein apt-get install dosbox. Danach muss ein Ordner für evtl. Konfigurationen und das Laufwerk angelegt werden: mkdir ~/.dosbox.
Laufwerk anlegen und einbinden
Für das Laufwerk (c:) muss ein Unterverzeichnis in ~/.dosbox und ein Konfiguration (~/.dosbox/dosbox.conf bzw. ~/.dosbox/dosbox-VERSION.conf) angelegt werden:
mkdir ~/.dosbox/drive_c
Die Datei ~/.dosbox/dosbox.conf muss folgenden Inhalt haben:
[autoexec]
mount c ~/.dosbox/drive_cWindows 3.11 installieren
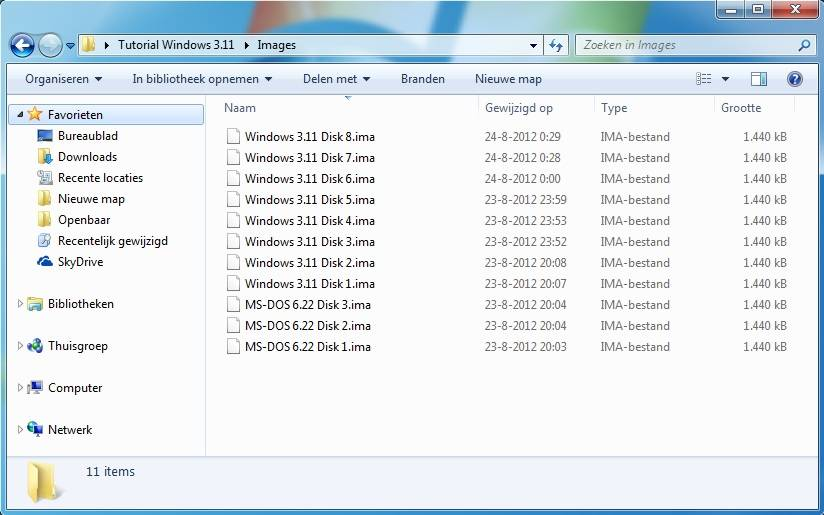
Zunächst muss man sich die Windows 3.11-Disketten besorgen. Ich hatte 8 Disketten-Images. Diese habe ich einzeln gemounten und in einen Installationsordner kopiert:
mkdir ~/.dosbox/drive_c/install
for i in `seq 1 8`; do
sudo mount -o loop Disk0$i.img /mnt
cp /mnt/* ~/.dosbox/drive_c/install
sudo umount /mnt
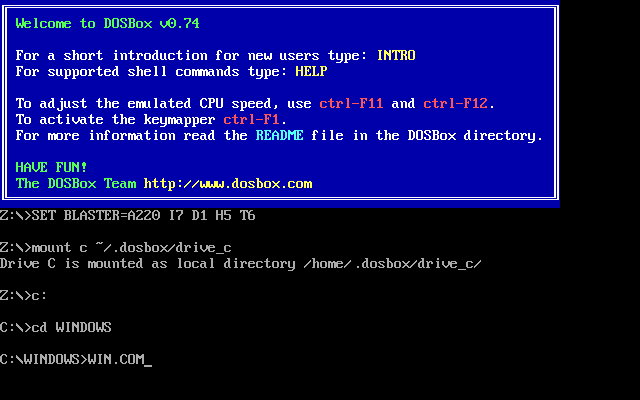
doneNun „dosbox“ starten und dort ins Laufwerk „c:“ und in den Ordner „c:/install“ wechseln. Jetzt kann mit „setup.exe“ die Win3.11-Installation beginnen.
Mamba auf das Laufwerk auf und starten
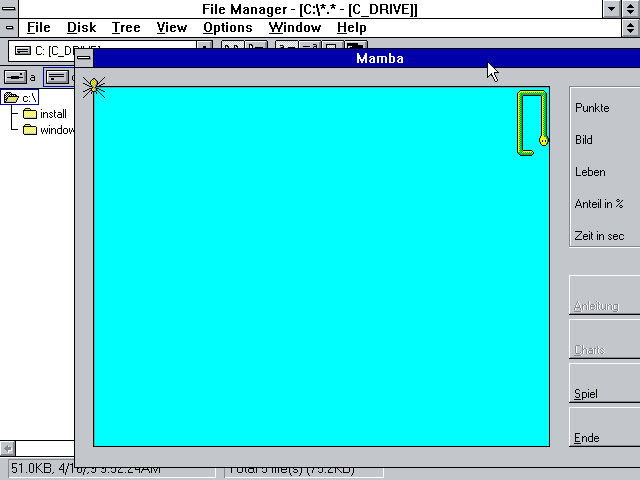
Zum Schluss wird Mamba in das Verzeichnis ~/.dosbox/drive_c kopiert. Nun Windows hochfahren, den File Manager öffnen und Mamba starten.
-

Windows aus DOS heraus starten. -

File Manager öffnen -

Mamba spielen

Linkliste
- https://www.dosbox.com/
- DosBox unter Ubuntu: https://wiki.ubuntuusers.de/DOSBox/
- Mounten via Loop Device: https://de.wikipedia.org/wiki/Loop_device
- Windows 3.11 im Internet suchen
- Mamba
Tutorial: Installing Windows 3.11 with (working) drivers! [Updated]
---------------------------------------------------------------------------------------------------------------------------------------------------------------------------------------
Tutorial: Installing Windows For Workgroups 3.11 (Windows 3.11) on VirtualBox with full driver support.
Introduction
For this Tutorial VirtualBox has to be installed (correctly) on your computer.
This tutorial was tested on the hosts Windows 7 SP1 and Linux (Ubuntu 11.04). But should probably work on other hosts as well.
For this tutorial I used my 3.5-inch floppy disks of MS-DOS 6.22 and Windows 3.11. My present pc no longer has a floppy disk drive, so I used an old pc to create floppy images (.IMA) from my old floppy's.
-

- floppyimages.jpg (55.78 KiB) Viewed 90277 times
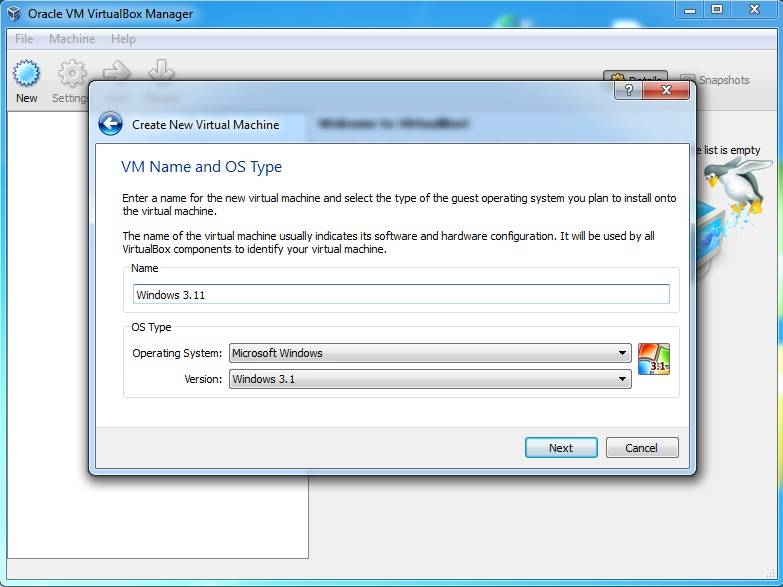
Create a virtual machine
Create in VirtualBox a new virtual machine with the name Windows 3.11 or any name you like. By OS Type select the Operating System: Microsoft Window. Under version select: Windows 3.1.
-

- vitualboxnewvm.jpg (50.34 KiB) Viewed 90277 times
By memory use the default Base memory size of 32 megabyte.
Hit Next.
Create a new hard disk.
Hit Next.
Use the default file type: VDI (Others may also work).
Hit Next.
By storage details use the option you like (I used Dynamically allocated)
Hit Next.
If you like, you can give the virtual disk another name or location.
Use the default disk size of 1,00 Gigabyte (MS-DOS 6.22 can only recognise hard disks up to 2.1 GB)
Hit Next, then two times Create to create the virtual machine.
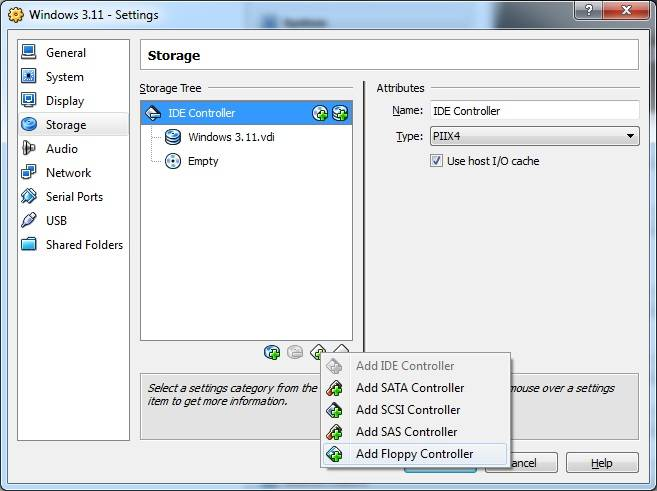
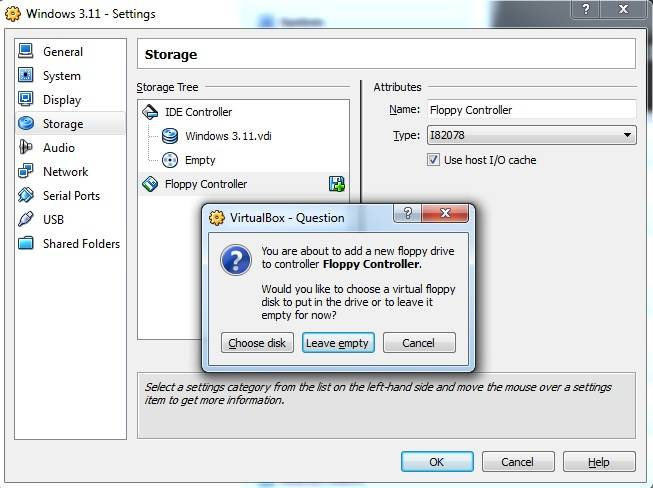
Adding a Floppy Controller
Right click on the new virtual machine, then Settings, under Storage click: Add floppy controller.
-

- newvmcreatedfloppy.jpg (38.54 KiB) Viewed 90193 times
-

- floppyleaveempty.jpg (44.12 KiB) Viewed 90193 times
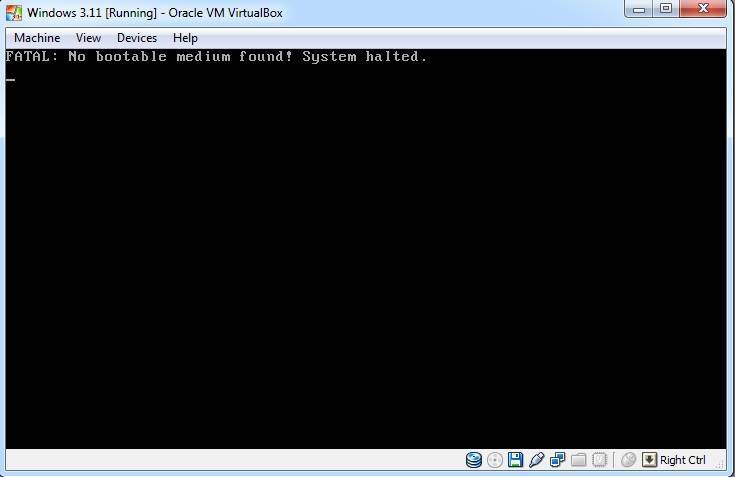
Selecting the MS-DOS Boot floppy
Now that your virtual machine is running you will get the following message:
-

- vmrunninghalted.jpg (18.19 KiB) Viewed 90084 times
-

- vmrunningselectmsdosflo.jpg (32.7 KiB) Viewed 90084 times
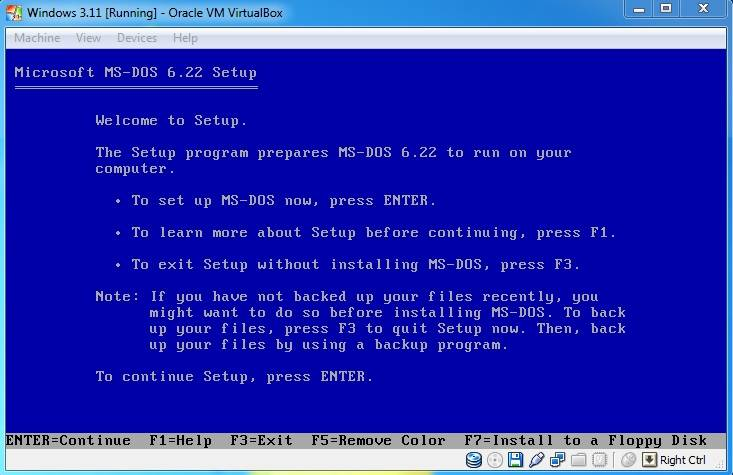
After the reboot VirtualBox loads the floppy Image and it will show the MS-DOS setup screen.
-

- msdossetup.jpg (49.46 KiB) Viewed 90084 times

Installing MS-DOS 6.22 (Format virtual hard disk)
Next Choose: Configure Unallocated disk space.
Next, hit Enter to reboot your virtual machine.
After the reboot MS-DOS will format the virtual hard disk.
-
- msdosformat.jpg (31.13 KiB) Viewed 90132 times
-

- msdossetuphitf8screen.jpg (26.61 KiB) Viewed 90132 times
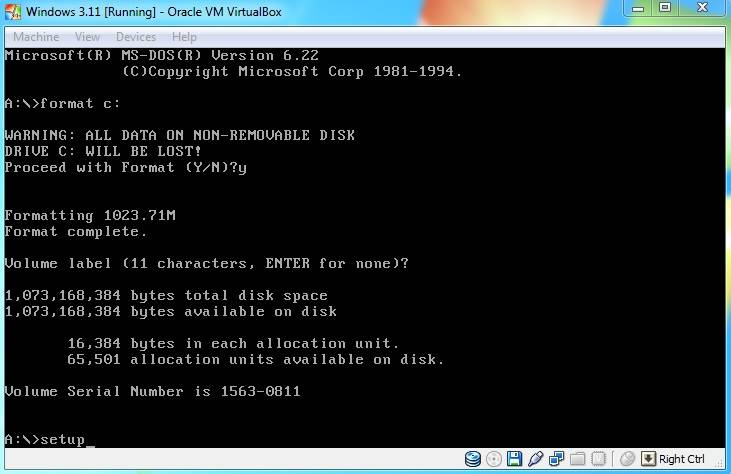
When the A:\> prompt will appears, give the command "format c:" and enter the command "setup" once formatting is done.
-

- msdossetuphitf8screenfo.jpg (41.05 KiB) Viewed 90132 times
Installing MS-DOS 6.22 (Continued)
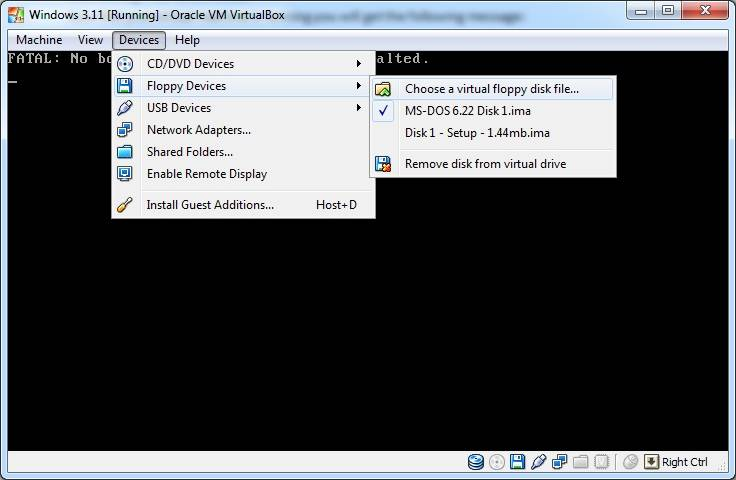
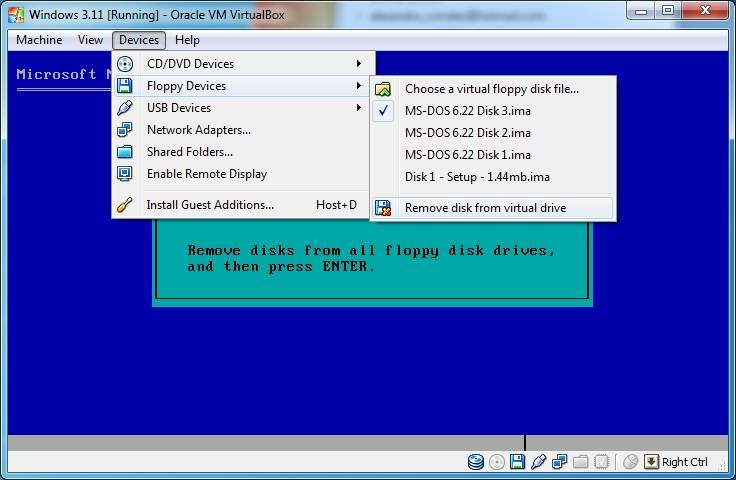
Click on devices in the menu bar again, then --> Floppy Devices --> Choose a virtual floppy disk file... then select your next MS-DOS 6.22 floppy image file.
Use the same method for disk #3.
-

- msdossetupnewdisk.jpg (43.79 KiB) Viewed 90132 times
-

- msdossetupfinishremoved.jpg (41.01 KiB) Viewed 90132 times
-

- msdossetupfinishfinal.jpg (33.21 KiB) Viewed 90132 times
Installing MS-DOS 6.22 (Continued)
- Attachments
-
-

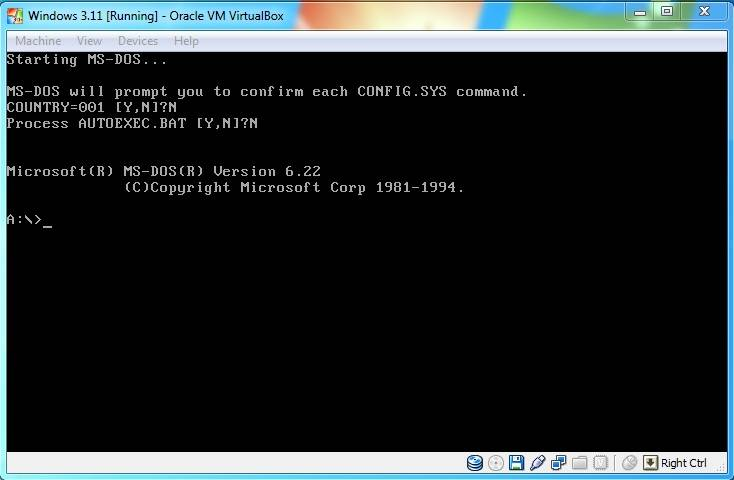
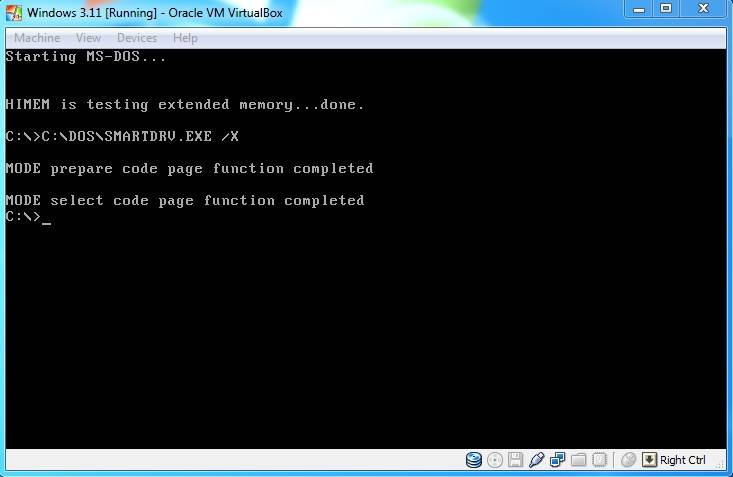
- dospromt.jpg (26.34 KiB) Viewed 90133 times
-
Installing Windows 3.11
Click on devices in the menu bar again then --> Floppy Devices --> Choose a virtual floppy disk file... then select your first Windows 3.11 floppy image file.
At the C:\> prompt, give the command "A:\" and enter the command 'setup' once the prompt A:\> will appear and hit enter.
The Windows for Workgroups 3.11 setup screen will appear.
-

- 311setupscreen.jpg (36.69 KiB) Viewed 90133 times
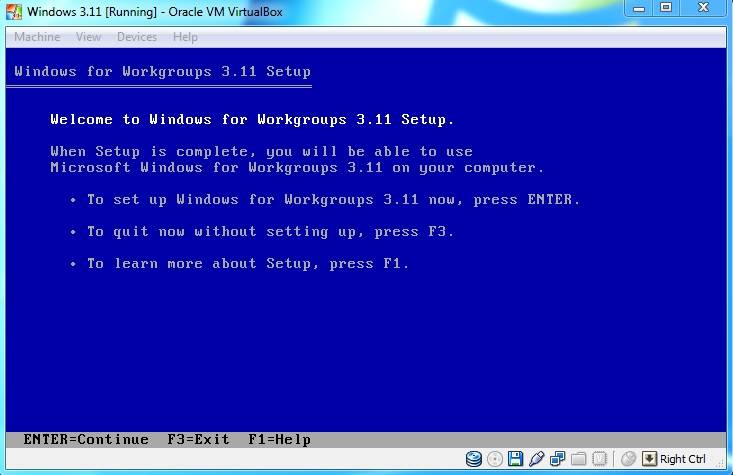
Hit enter to setup Windows for Workgroups 3.11.
On the next screen choose the Express Setup with the enter key (the express setup is usually fine).
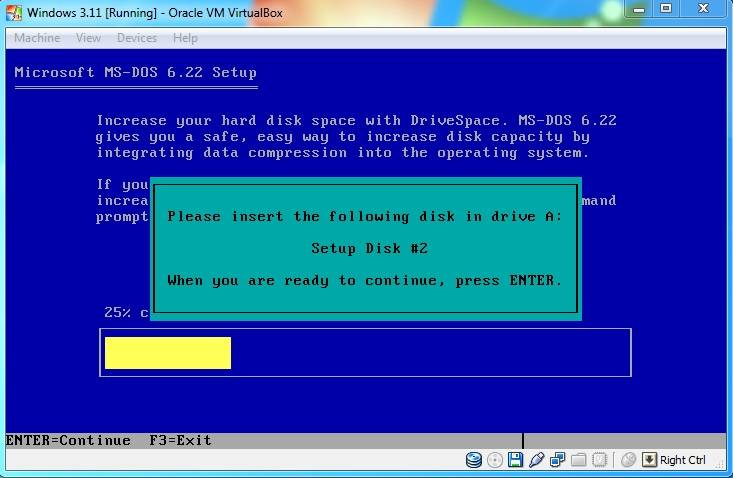
Windows will now be installed. When the setup asks for disk 2, click on devices in the menu bar again then --> Floppy Devices --> Choose a virtual floppy disk file... then select your next Windows 3.11 floppy image file.
After that the setup will reboot to a more graphical style and ask for your name, company and product number (use your windows 3.11 product number )
-

- 311setupproductnumber.jpg (60.39 KiB) Viewed 90133 times
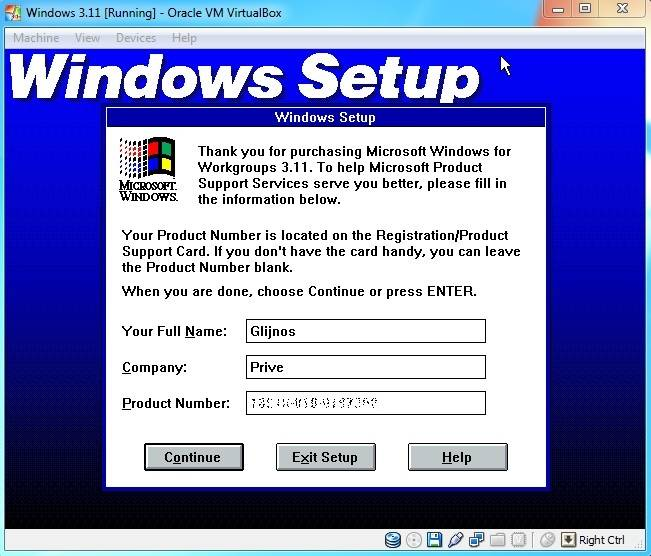
Verify your information and Click Continue.
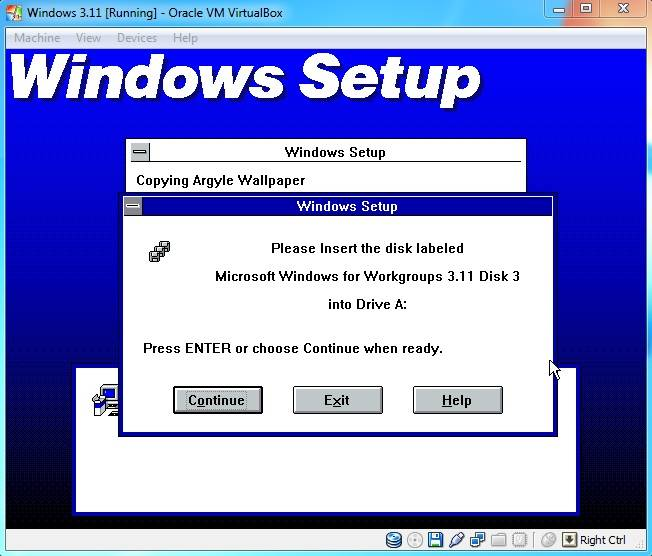
The setup will now continue. When it ask for the next disk, select your next Windows 3.11 floppy image and hit Enter.
-

- 311setupfloppydisk3.jpg (47.49 KiB) Viewed 90133 times
Installing Windows 3.11 (Continued)
When it asks for Network Setup, just press continue (You have to configure this later).
When it asks for the application name for C:\DOS\EDIT.COM, leave the default "MS-DOS Editor" option enabled and press OK.
You can choose to either Run Tutorial or Skip Tutorial.
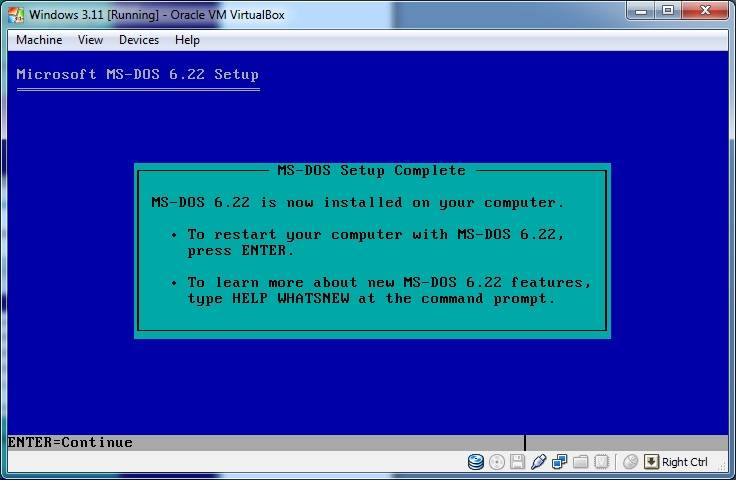
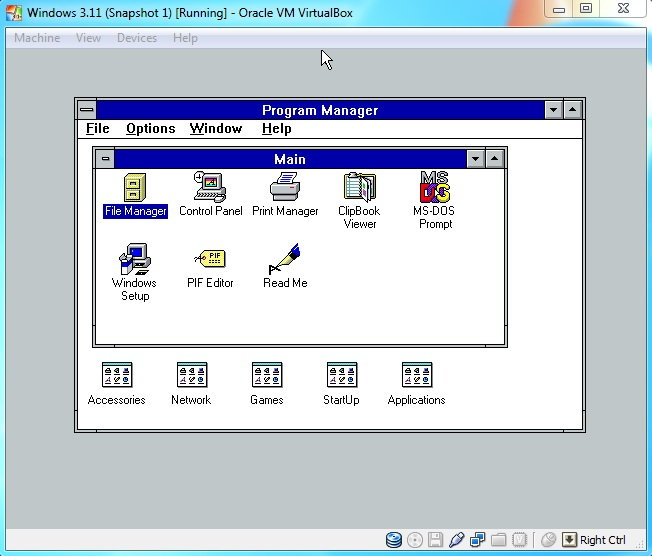
Setup complete!
Remove your last floppy Image and press Restart Computer.
-

- 311setupcomplete.jpg (49.87 KiB) Viewed 90133 times

-

- 311windows.jpg (76.71 KiB) Viewed 90132 times
Adding CD-ROM Support
Search the web for the file AOATAPI.SYS and Copy the AOATAPI.SYS file to a floppy disk image, or use the CD-ROM driver floppy Image that I already made for you.
Start your virtual machine. Load the floppy Image, and then type COPY A:\AOATAPI.SYS C: at the command prompt to copy the AOATAPI.SYS file to your C: drive.
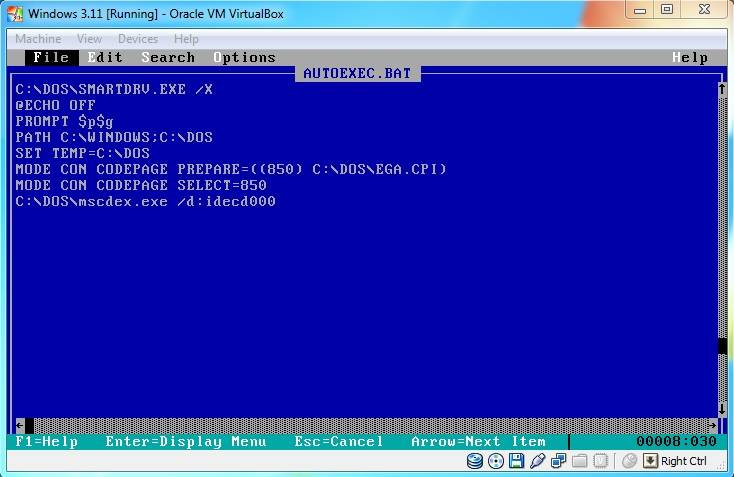
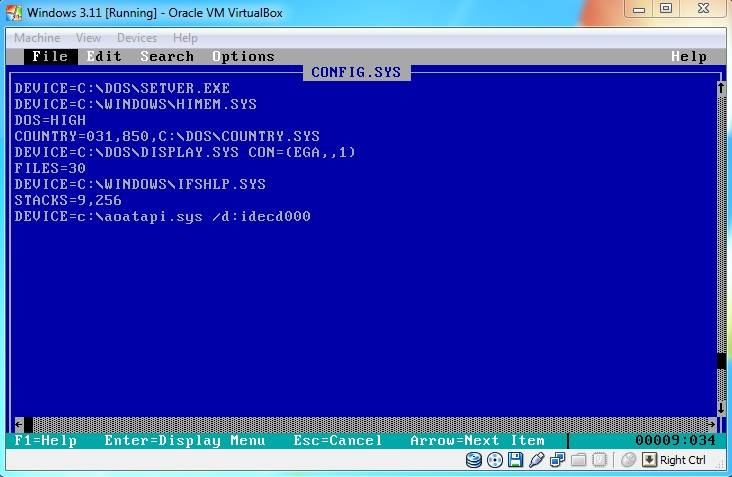
After that you must edit your AUTOEXEC.BAT and CONFIG.SYS files.
At the C:\ command prompt type EDIT AUTOEXEC.BAT. Place the line: c:\dos\mscdex.exe /d:idecd000 in the autoexec.bat and save, then exit (use the Alt key to activate the menu).
-

- cdromeditautoexec.jpg (45.24 KiB) Viewed 90131 times
-

- cdromeditconfig.jpg (45.65 KiB) Viewed 90131 times
I loaded the VirtualBox Guest additions for testing.
-

- cdromloaded.jpg (45.47 KiB) Viewed 90131 times
Sound Card Installation
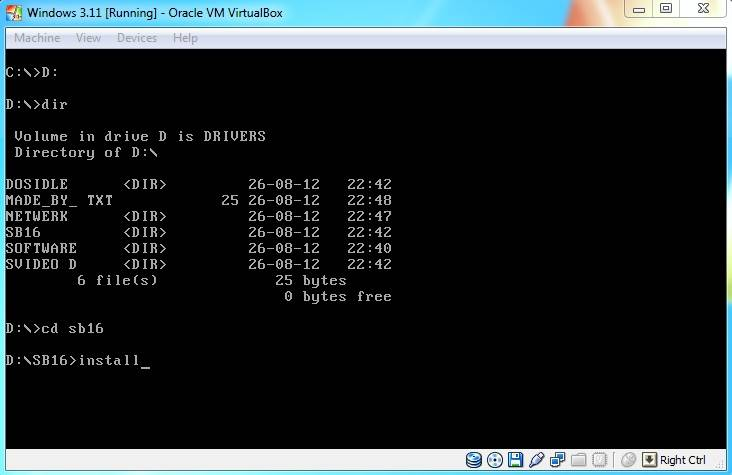
Start-up MS-DOS to a C:\ prompt. Load the floppy or CD image, access the SoundBlaster 16 drivers on the A: or D: drive, then type install.
Note: On my driver CDROM type CD sb16 at the command prompt and then install.
-

- soundinstallcmd.jpg (32.32 KiB) Viewed 90243 times
-

- soundinstallsettings.jpg (45.51 KiB) Viewed 90243 times

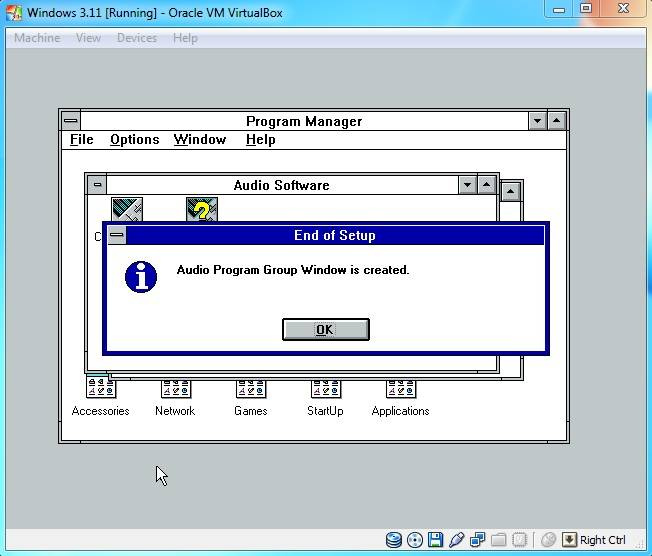
When you run windows it will create a Audio Program Group automatically.
-

- soundwindows311.jpg (38.2 KiB) Viewed 90243 times
Network Installation
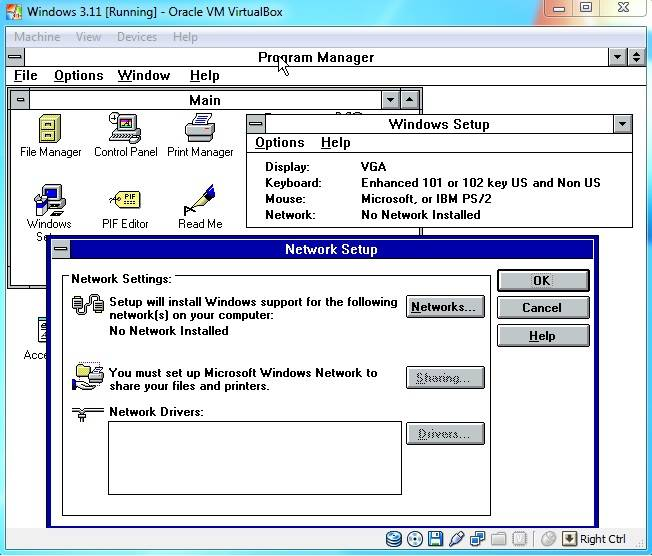
Boot into windows 3.11 and open the program group "Main". In "Main" open the program "Windows Setup", click "options" and then "Change Network Settings".
-

- networksetup.jpg (60.12 KiB) Viewed 90132 times
-

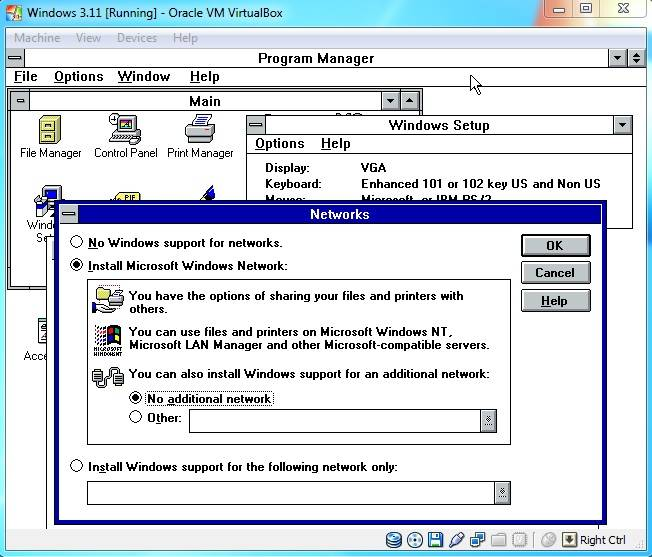
- networkinstallnetwork.jpg (65.24 KiB) Viewed 90132 times
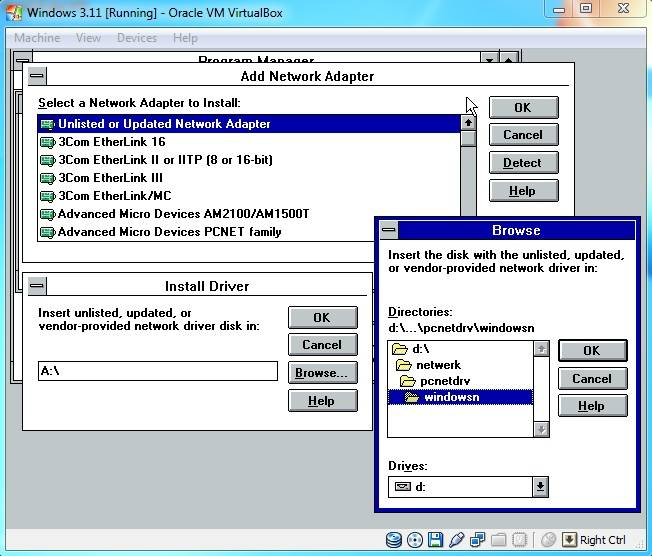
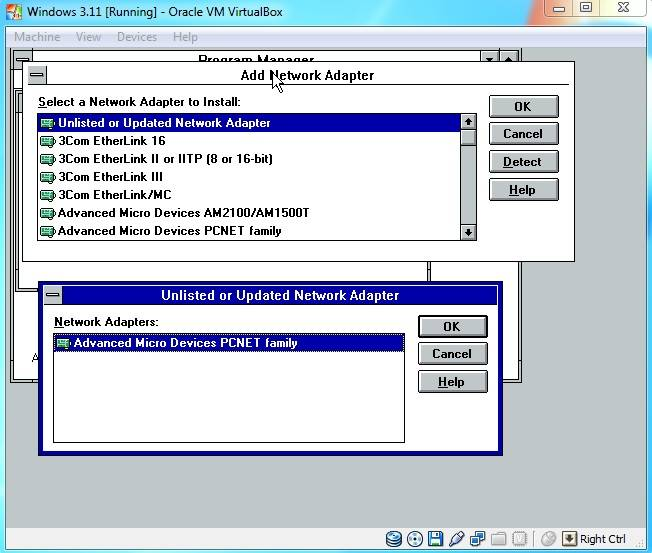
On the "Add Network Adapter" screen select the "Unlisted or Updated Network Adapter" option and click "OK".
-

- networksetupunlisted.jpg (51.35 KiB) Viewed 90132 times

Network Installation (Continued)
-

- networkdriverlocationse.jpg (61.76 KiB) Viewed 90132 times
-

- networkdriveramdselect.jpg (51.05 KiB) Viewed 90132 times
-

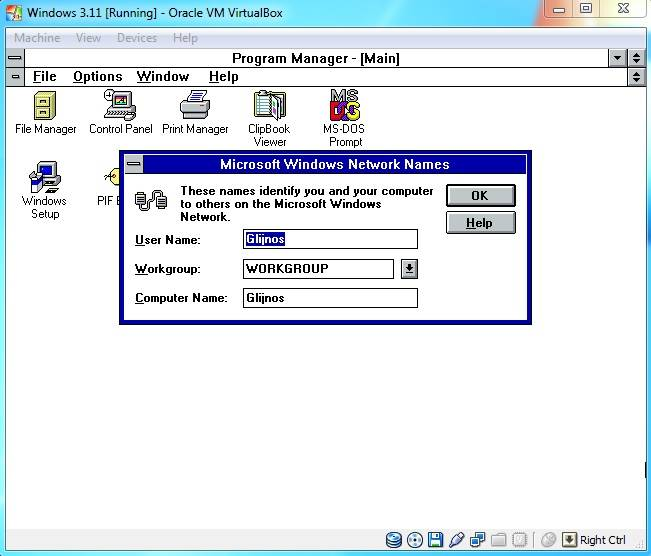
- networkcomputername.jpg (42.49 KiB) Viewed 90132 times
Network Installation (Continued)
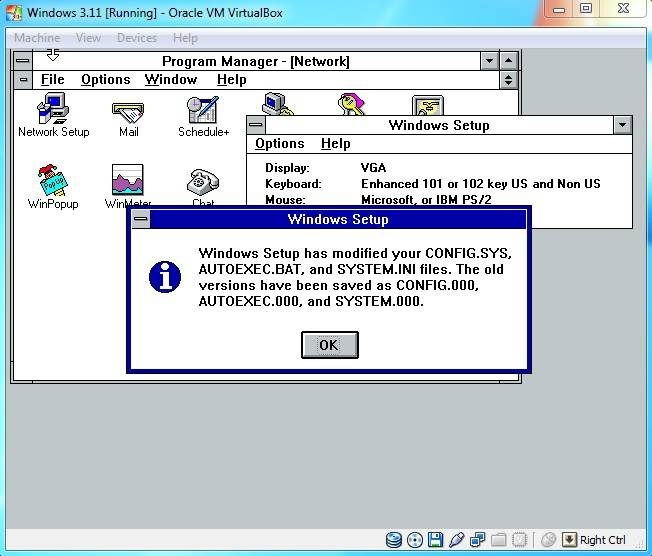
When the installation is complete click "OK" and then click "Restart Computer".
Don't forget to remove your windows 3.11 installation floppy!
-

- networksetupfinishmodif.jpg (50.58 KiB) Viewed 90086 times
-

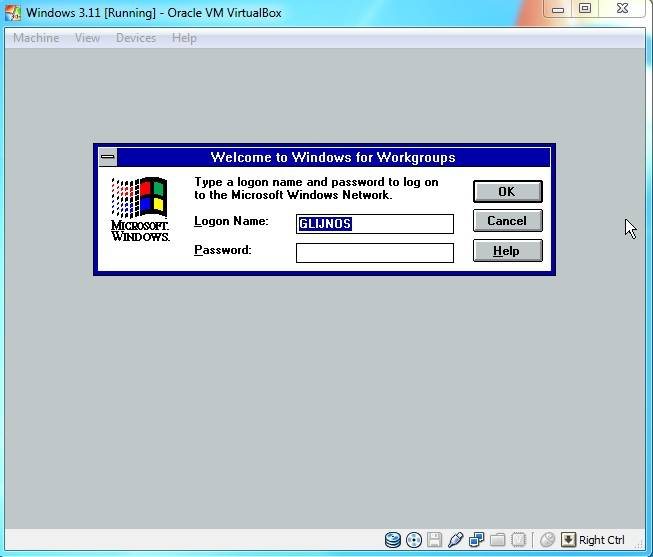
- welcomecq.jpg (31.09 KiB) Viewed 90086 times
-

- networkprotocolsetup.jpg (59.64 KiB) Viewed 90086 times
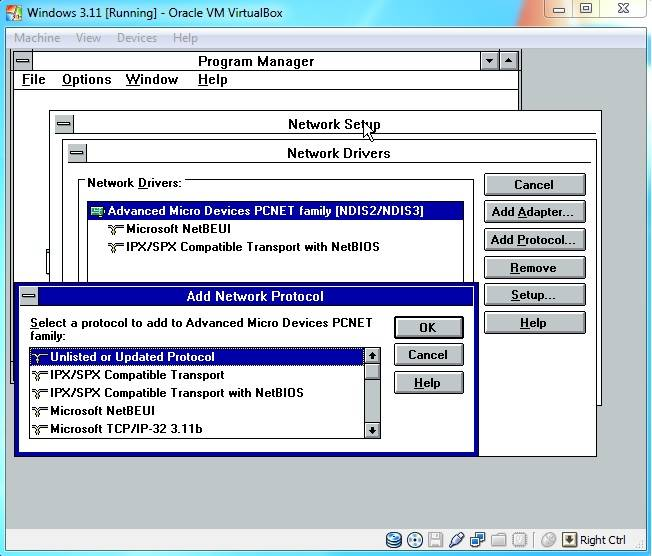
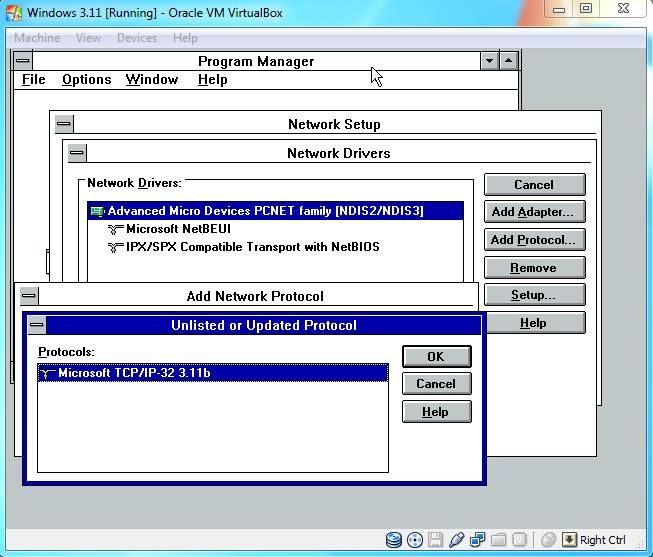
Network Installation (Continued)
Select the Microsoft TCP/IP32 3.11b protocol and click "OK" again.
-

- networkmicrosoftprotoco.jpg (53.93 KiB) Viewed 89827 times
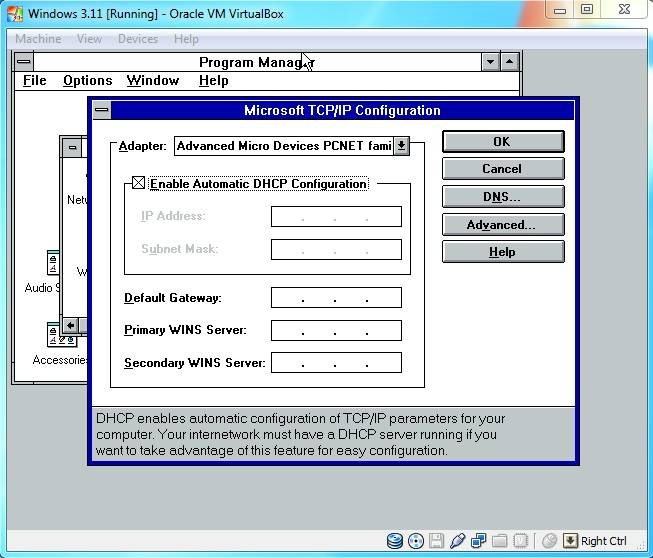
When the "Microsoft TCP/IP configuration" window pops up select "Enable Automatic DHCP configuration" or use your own configuration and hit "OK".
-

- networkdhcp.jpg (53.92 KiB) Viewed 89827 times
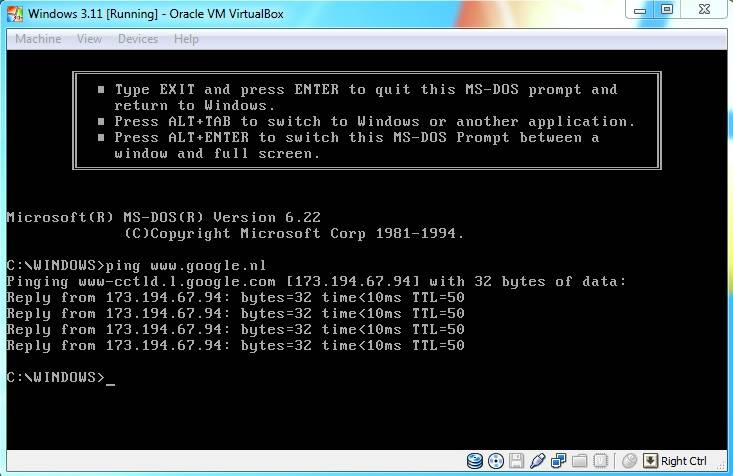
To confirm that networking is working at this stage, try opening a MS-DOS Prompt from the "Main" group and type "ping http://www.google.nl".
-

- networkping.jpg (54.55 KiB) Viewed 89827 times
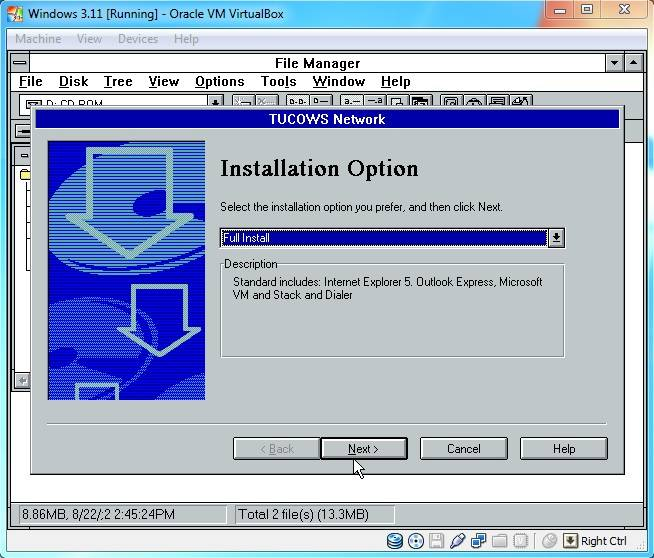
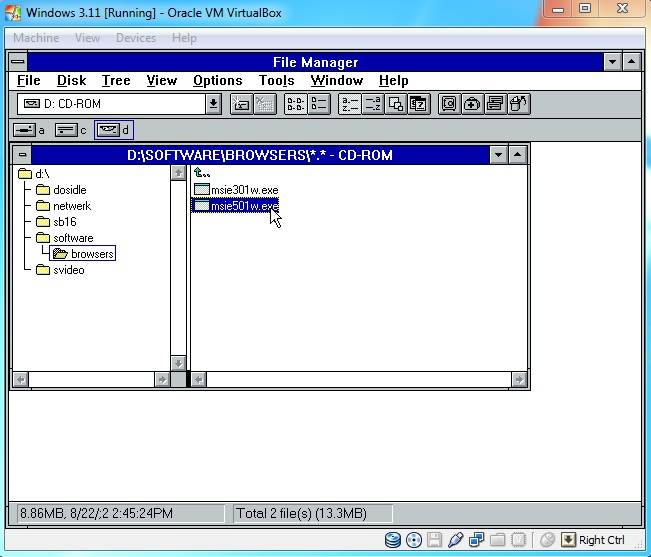
Installing Internet Explorer 5.01
Search the web for the "Internet Explorer 5 (windows 3.11)" and copy the installer to a CD-ROM disk Image. You can also use the CD-ROM disk image that I made for you.
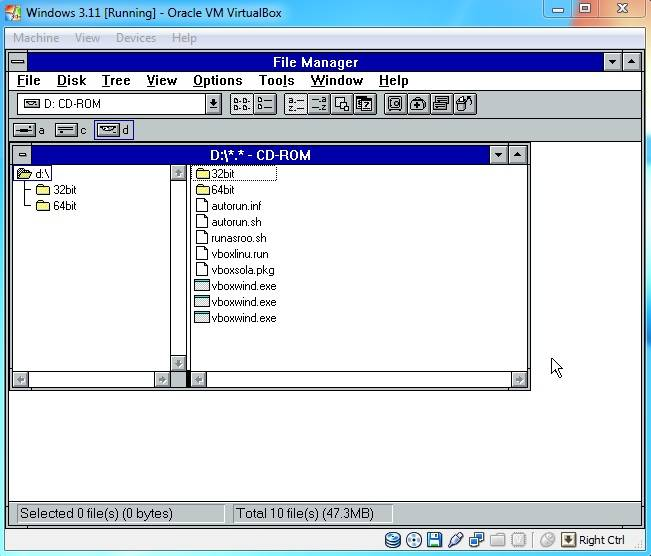
In windows open the File Manager, open your D:\ drive and run the msie501w311 installer.
-

- ie5setupbrowse.jpg (45.28 KiB) Viewed 89869 times
-

- ie5setup.jpg (58.7 KiB) Viewed 89869 times
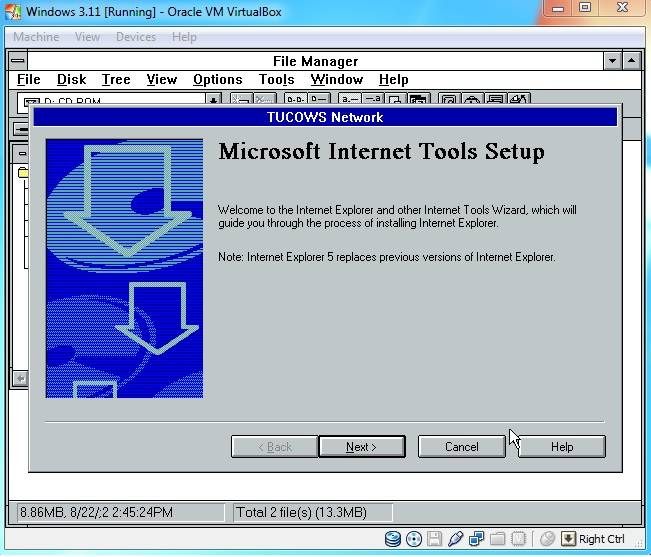
Use the default Full install and click "Next >".
-

- ie5setupfullinstall.jpg (61.88 KiB) Viewed 89869 times